Audi A8 (4E) Battery Replacement: Difference between revisions
No edit summary |
No edit summary |
||
| Line 19: | Line 19: | ||
'''Note''': The 10 digit serial number may be preceded by the | '''Note''': The 10 digit serial number may be preceded by the Battery Vendor Code, for instance VA0, HOG or Z5G. See examples below: | ||
{| class="wikitable" border="0" width="650" | |||
|- | |||
!colspan="14" style="background:white"| Click on thumbnail image to enlarge. | |||
|- | |||
| [[File:Battery serial number.jpg|200px|center|caption]] | |||
| [[File:Batterycode.jpg|200px|center|caption]] | |||
|- | |||
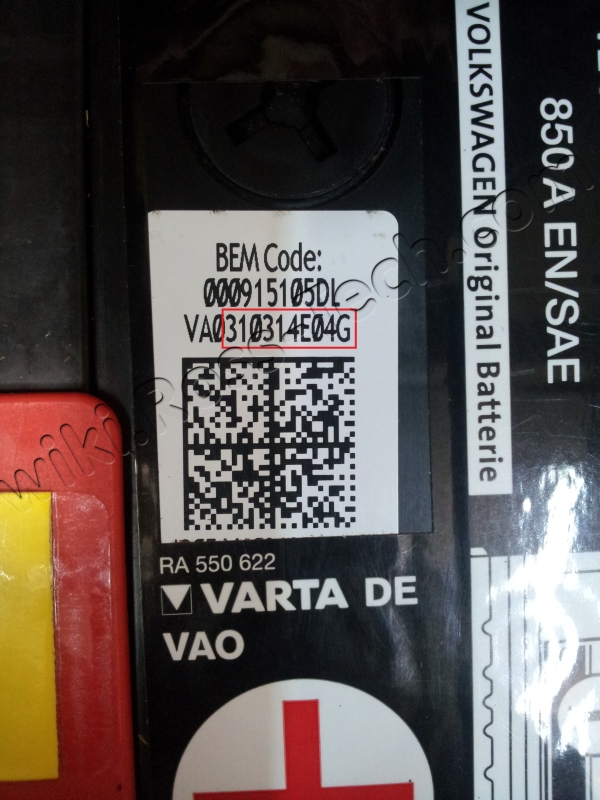
| If the code is VA0310314E04G then drop the VA0 and just enter 310314E04G as the Serial Number. | |||
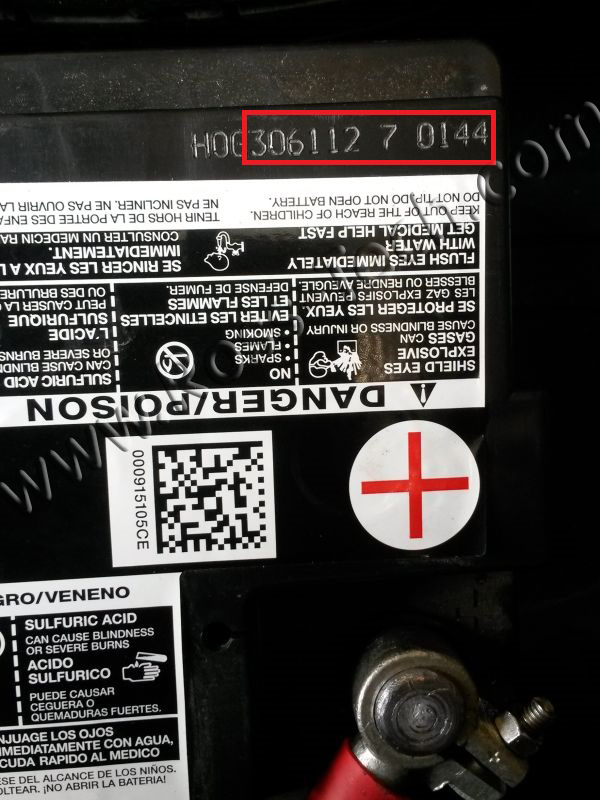
| If the code is HOG30611270144 then drop the HOG and just enter 0611270144 as the Serial Number. | |||
|} | |||
Sometimes the battery part number sticker can cover up the white sticker with the serial number. | |||
<br> | |||
If you are encountering difficulty communicating with modules during or after the coding process make sure the battery charger is connected as per repair manual. Click the photo to enlarge. | If you are encountering difficulty communicating with modules during or after the coding process make sure the battery charger is connected as per repair manual. Click the photo to enlarge. | ||
[[File:A8 charger hookup.jpg|left|200px|caption]] | [[File:A8 charger hookup.jpg|left|200px|caption]] | ||
Revision as of 21:19, 15 July 2014
This procedure details how to replace a battery in a vehicle using a separate battery management control module. See the separate instructions for models where the battery management control module is a slave/subsystem of the gateway.
The following procedure does assume you are using a battery supplied by VW/Audi, all necessary details for the following steps can found on the battery itself. Make sure to refer to the factory repair manual in order to fulfill all additional prerequisites.
[Select]
[61 - Battery Regulation]
[Coding - 07]
Use the pull down menu to select the battery (slave) listed as #1.
[Battery Coding]
- Enter the new Battery Part Number (10 or 11 digits).
- Enter the new Battery Serial Number (10 digits).
- Select the new Battery Vendor.
[OK]
[Do it!]
[Close Controller, Go Back - 06]
Your new Battery should now be coded and the Battery Control Module should be aware of the new Battery.
Note: The 10 digit serial number may be preceded by the Battery Vendor Code, for instance VA0, HOG or Z5G. See examples below:
Sometimes the battery part number sticker can cover up the white sticker with the serial number.
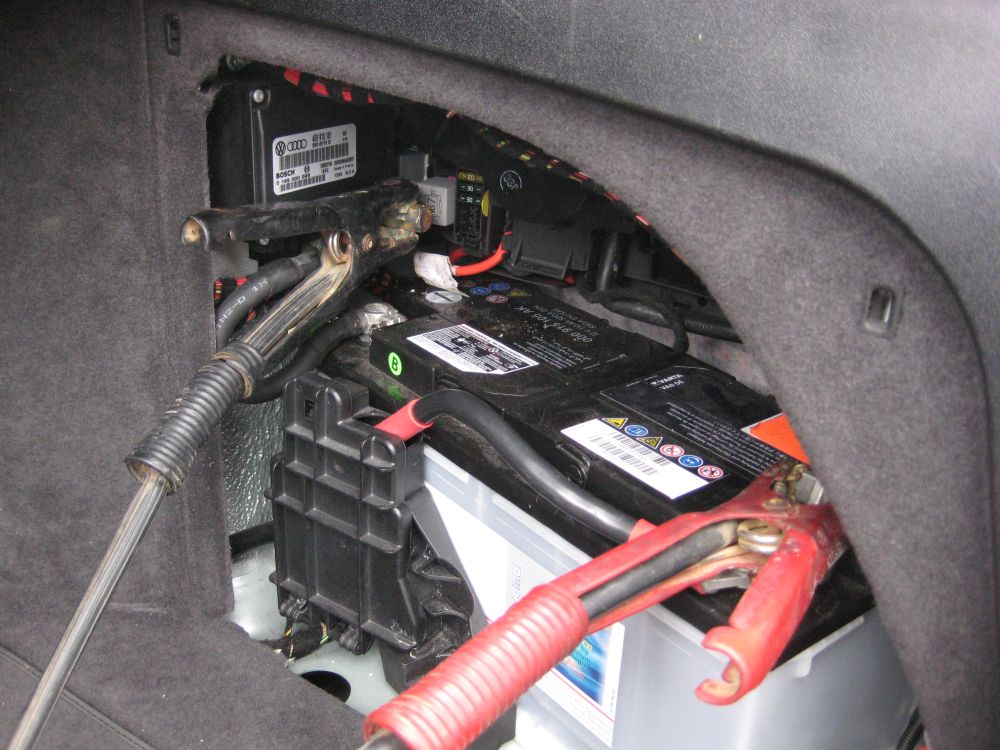
If you are encountering difficulty communicating with modules during or after the coding process make sure the battery charger is connected as per repair manual. Click the photo to enlarge.

No categories.


